With GuardsPro Dispatcher, you can streamline the way dispatch calls are handled across your post sites, all in real time and from a centralized platform. This feature is designed to simplify communication and ensure that every dispatch call is logged, tracked, and resolved efficiently.
Guards assigned to a dispatch can instantly view and respond to calls through the GuardsPro guard mobile app, helping to significantly reduce response times to incidents and service requests. The system also provides full visibility and a complete record of all dispatch activity, enhancing accountability and operational oversight.
Use Case:
For example, if you’d like to report suspicious activity at your post site, you can immediately log a ticket, assign it to a guard, and monitor the response in real time. This helps ensure faster reaction times and enhanced on-site safety.
✅ Step-by-Step Guide: Editing a Dispatch Call on the Client Web Portal
You can filter the list of dispatch calls based on your post sites, ticket status, and a specific date range using the available filters.
To edit a dispatch ticket, click on the three dots and select Edit from the drop-down.
Make the necessary changes to the dispatch ticket and click "Submit" to save your updates.
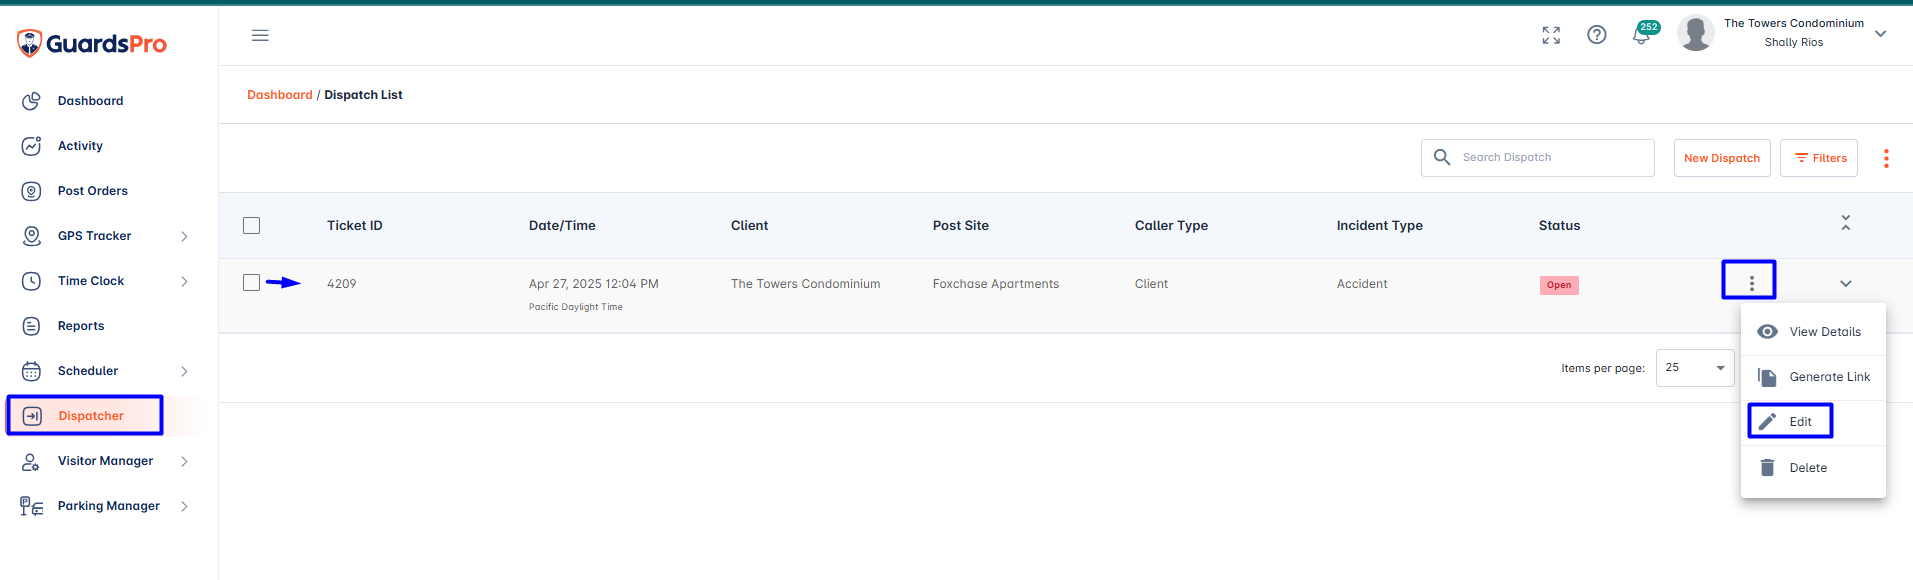
From the same menu, you can also delete, view logs, or generate a shareable link for the dispatch ticket.
Note: Using the Generate Link option, you can create and share a temporary link to the dispatch call, accessible for a specified period of time.
Save Filter Option
Additionally, while filtering the dispatch list there is "Save Filter" option available to save your selected filters for generating desire list for the future use. Once you've applied the desired filters, simply click Save Filter, and the system will retain your selections. This helps streamline your workflow by eliminating the need to set the same filters repeatedly.
Your saved filters will be easily accessible the next time you visit the page.
To save the filter, Apply your desired filters and click the "Save Filter" option.
Next, A pop-up will appear prompting you to enter a filter name and an optional description. Click "Add" to save the filter.
You can view your saved filters by clicking on the "Saved Filter" option located next to the filter section. Simply select a saved filter option to view data based on the predefined criteria.
To edit or delete a saved filter, click on the three-dot menu next to the filter name on the same screen.
Note: Please note that the date and time range will not be saved as part of the filter. You will need to manually select the date and time each time you use a saved filter to generate the desired report.
Emailing or Exporting Dispatch Reports
You can easily email a dispatch report to yourself or your team members, or export it for your records:
-
Simply select the desired report to email then click on the three dots next to the Filters option, select "Email Report", choose the attachment type, enter the recipients’ email addresses, and click "Send".
-
To export the report, click on the three dots next to Filters and select either "Export as PDF" or "Export as Excel". The report will be automatically downloaded to your system.
If you have any more questions, please feel free to contact our support team anytime.
Please feel free to watch our informative tutorial video on YouTube :
Comments
0 comments
Please sign in to leave a comment.